
How to Set Up a PA System
STEP 1
Start with a map
Before you buy a single wire, draw your space. Grab a sheet of paper or a sketch on your phone and lay out the the whole grounds and each building you want to add to from above like a floor plan. This map is a very important step. Everything else is decided by it.
after you have a map you need to find:
the best place to put the speakers.
the best way to get the wires there.
To find the best places to place the speakers and the optimal path for running the wires, a good drive around camp is needed (make sure you have a golf cart because it will be a long walk). Imagine the wires traveling in various locations and identify the best route. If there are any obstacles such as roads or paths that block the path, prioritize minimizing the inconvenience and selecting an ideal location for hanging the speakers.
Pro tip: tab a screen shot from Google Maps and upload it to canva and use shapes and draw to map out your speakers and wires (see photo)
On your map, mark three things:
Where the sound needs to reach; the rooms, halls, hallways, or outdoor areas where people should hear clearly.
Where each speaker will go; draw a cone for every speaker (the small part where it starts and the bigger it goes outward - see photo bellow).
Which direction each speaker faces ; draw an arrow out of each cone. Sound travels in the direction the speaker points.
Get Confirmation from Directors and Admin; besides the fact that this step will help you plan what to buy and how to run your wires, this will give clarity on the priorities where you want and need sound and of what quality.

Sketch a map of the plans
How far and how wide does a speaker actually cover?
A speaker doesn't blast sound in a perfect circle. It throws sound forward in a cone shape, narrow and far if it's a focused speaker, wide and shorter if it's a spread-out one. Think of it like a flashlight beam.
How far (throw): A small indoor speaker covers maybe 20–40 ft. A good outdoor horn speaker can throw sound 100–300+ ft.
How wide (coverage angle): A typical speaker covers a wedge of about 90°. Point two speakers slightly apart and you fill a wide area with no dead spots.

Rule of thumb: Aim for the cones to slightly overlap so there are no silent gaps. If someone has to strain to hear in one spot, add a speaker or re-aim one you already have.
step 2 (OPTIONAL)
Understand zones (different lines)
A zone is a group of speakers on their own wire run that you can control separately. Each zone is one "line" coming out of your amp.
Why bother with zones? Because you rarely want every speaker doing the same thing:
You might want music in the dining hall but announcements only outside.
You might want the office quiet while the gym is loud.
You might want to turn off areas nobody is using.
Each zone is its own line of wire running from the amplifier, hitting one speaker, then continuing to the next speaker, and the next — all in a chain. We'll cover exactly how to make that chain in Step 5.
Advance stuff: Different amps have different options. Some come with many lines, some come with one or two. If you have an amp and want to make zones, you can make a switch board by connecting the main wire to the amp to switch, and the different zone wires come out of each switch.

Here is a switch board we inherited from the 1900 it still works!
STEP 3
Choosing your speakers
Before we continue let me explain some of the terminology in simple terms. It took me a while to figure this out:
The source pushing the audio to the speakers is called the Amplifier or in short Amp.
The power the amplifier uses to send audio is called Volts.
The box converting your music or voice to the amplifier is called the Transformer.
The wire used to carry any audio is called a 2-Conductor Cable.
Here is a visual:
Now we can get into the two big decisions: what kind of speaker, and what electrical system it runs on (8-ohm vs 70-volt).
Speaker types
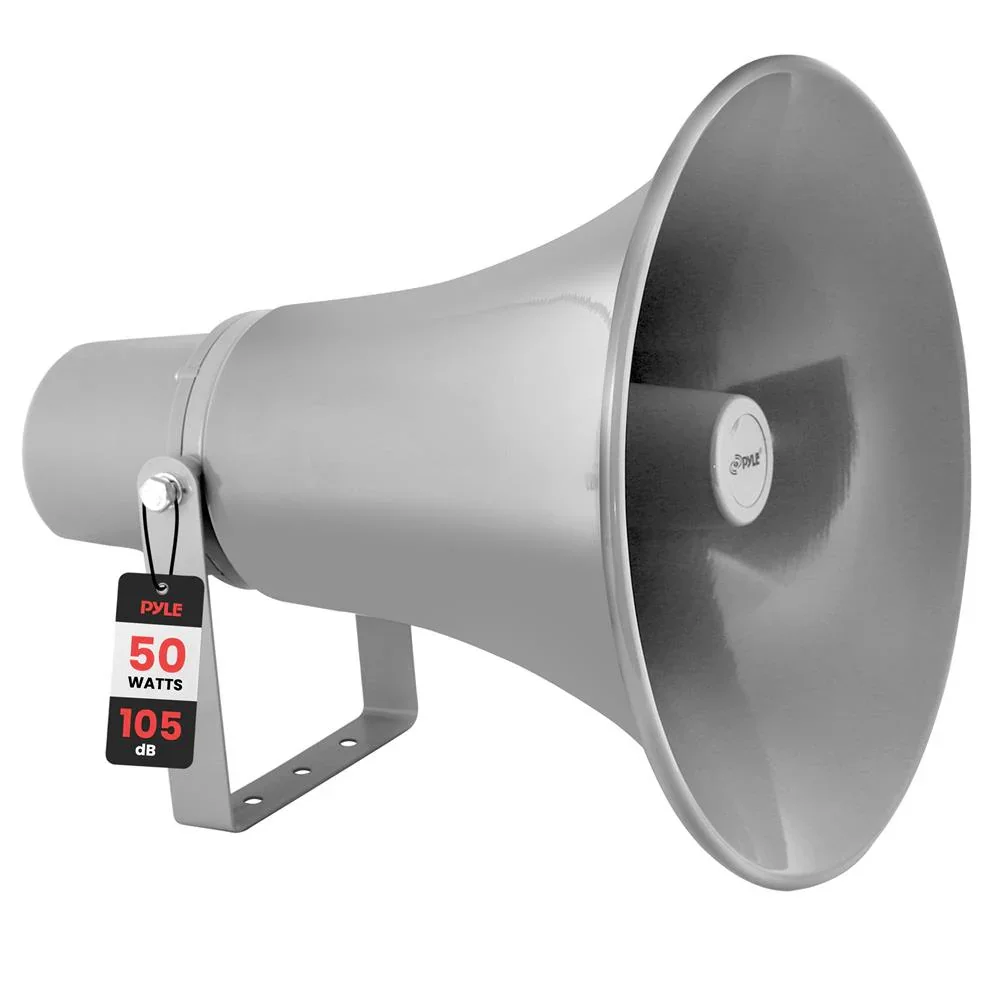
The default camp PA system what we grew up with the - good ole horn speaker.
Pros: Cost effective, Durable, easy to install, loud, low voltage (can have many on one line)
Cons: Horrible quality sound!
Good for announcements but not great for music.

an upgrade from the horn and here you have a big range of quality and cost depending on how much you care about the quality of the music.
Pros: great quality, can carry the voltage very far and still keep quality.
Cons: can be costly, harder to instal, less durable.
Great for everything just cost you more. I use a company called tru audio they have amazing speakers, rockville is a cheaper option with less quality
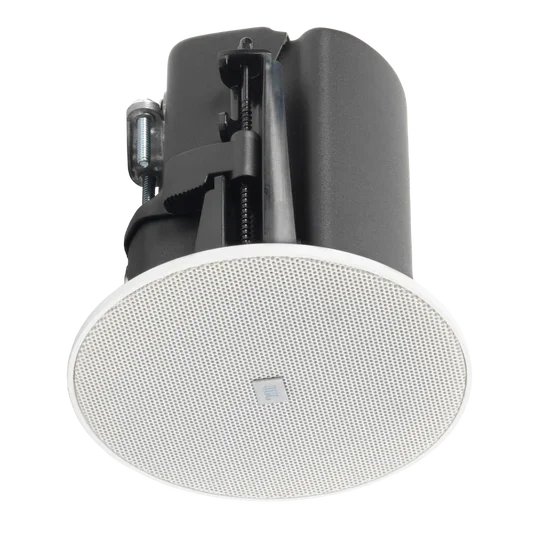
ceiling speakers (indoor)
these can be great quality and good pricing but only works for indoor and you need to make some holes in your ceiling.
Pros: Great quality, look way better because it blends into the room.
Cons: can be costly, harder to install - need to make hold in your ceiling, only works indoors.
The big one: 70-volt vs 8-ohm
This is the choice that confuses everyone, so here it is in plain terms:
| 8-ohm regular | 70-volt constant voltage | |
|---|---|---|
| Best for | A few speakers, close to the amp | Many speakers spread over a big area |
| How many speakers | Usually 1–4 per line | Dozens on one line |
| Wire distance | Short runs only — long runs lose power | Long runs are fine, very little loss |
| Volume control | All same volume | Each speaker has a tap — set each one louder or softer |
| Sound quality | Slightly better for music | Excellent for speech and background; great for big jobs |

With 70-volt, each speaker has a little dial or set of wires called a tap (measured in watts, like 5W / 10W / 15W / 30W). A higher tap = that speaker pulls more power and plays louder. This lets you make the far speaker loud and the office speaker quiet — all on the same line.
step 4
Picking the right wire
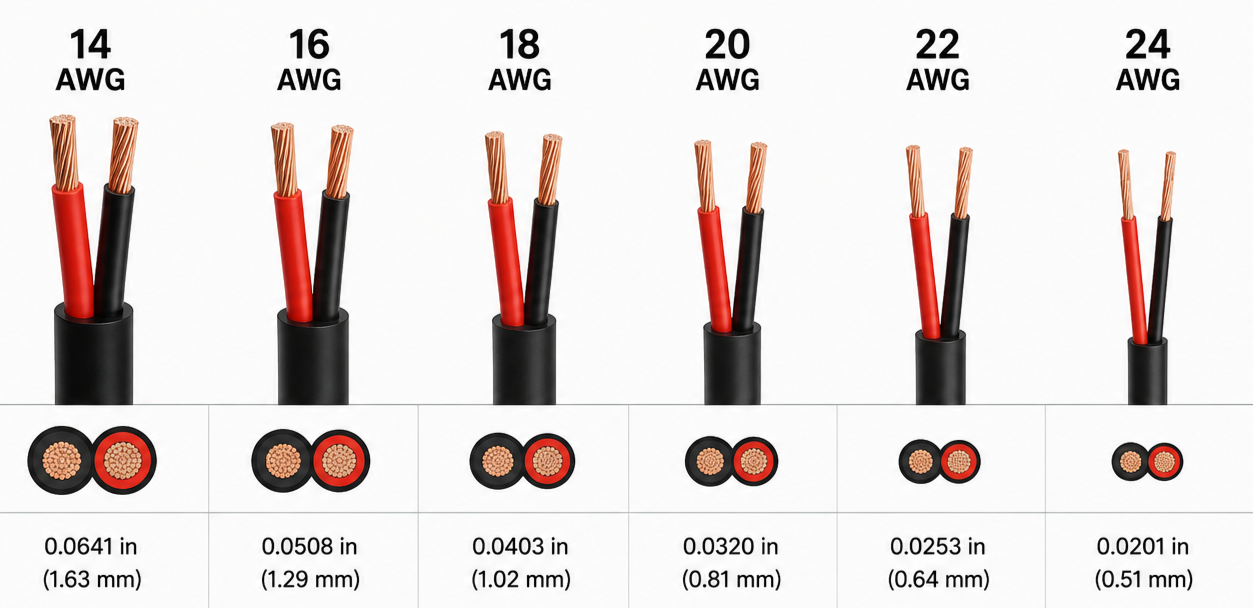
Speaker wire is rated by gauge (AWG means American Wire Gauge. It is the size/thickness of the wire. Here's the part that trips people up: a smaller number means a THICKER wire. So 12-gauge is fat, 18-gauge is thin.
Thicker wire carries power farther without losing it. Thin wire is cheaper and fine for short runs. The longer the run, the thicker you want to go.
Example:
14 AWG = thicker wire
16 AWG = medium/thick wire
18 AWG = thinner wire
22 AWG = very thin wire
Outdoor runs: Use wire rated for outdoor/direct-burial or run it through conduit. Regular indoor wire will crack and corrode outside. it’s normal called UV wires and can be expensive.
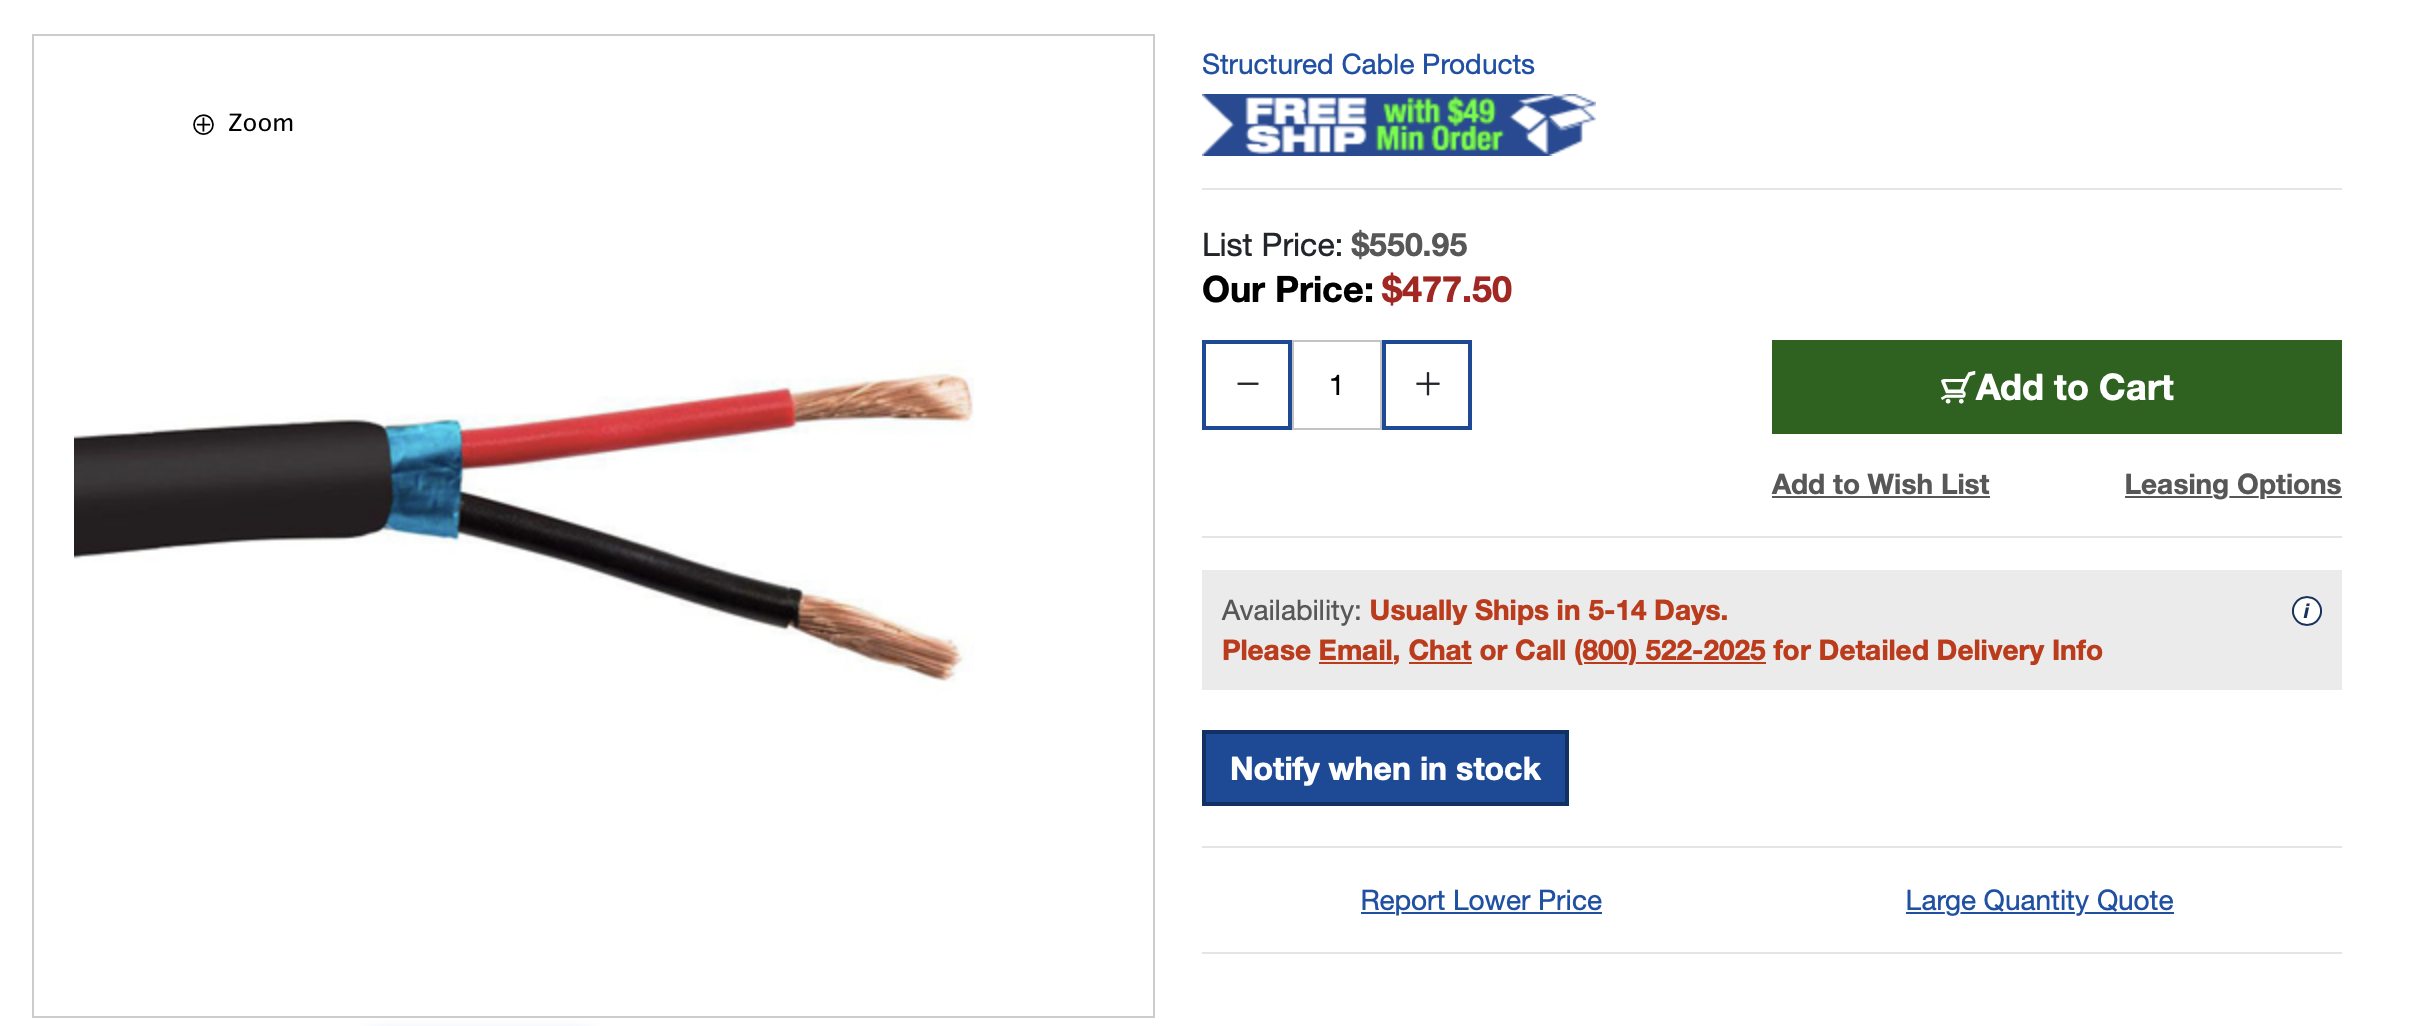
Outdoor wires have a special coating and can last forever but cost much more.
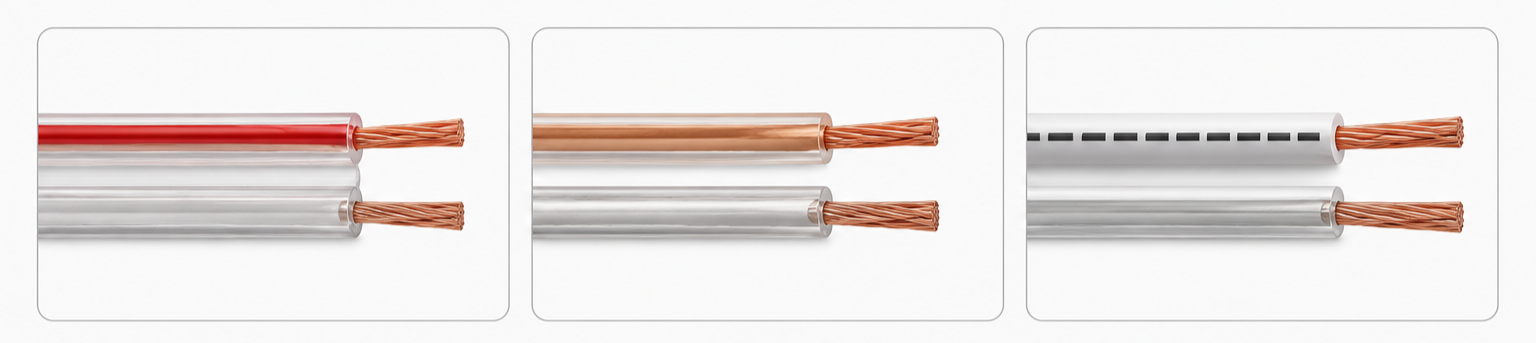
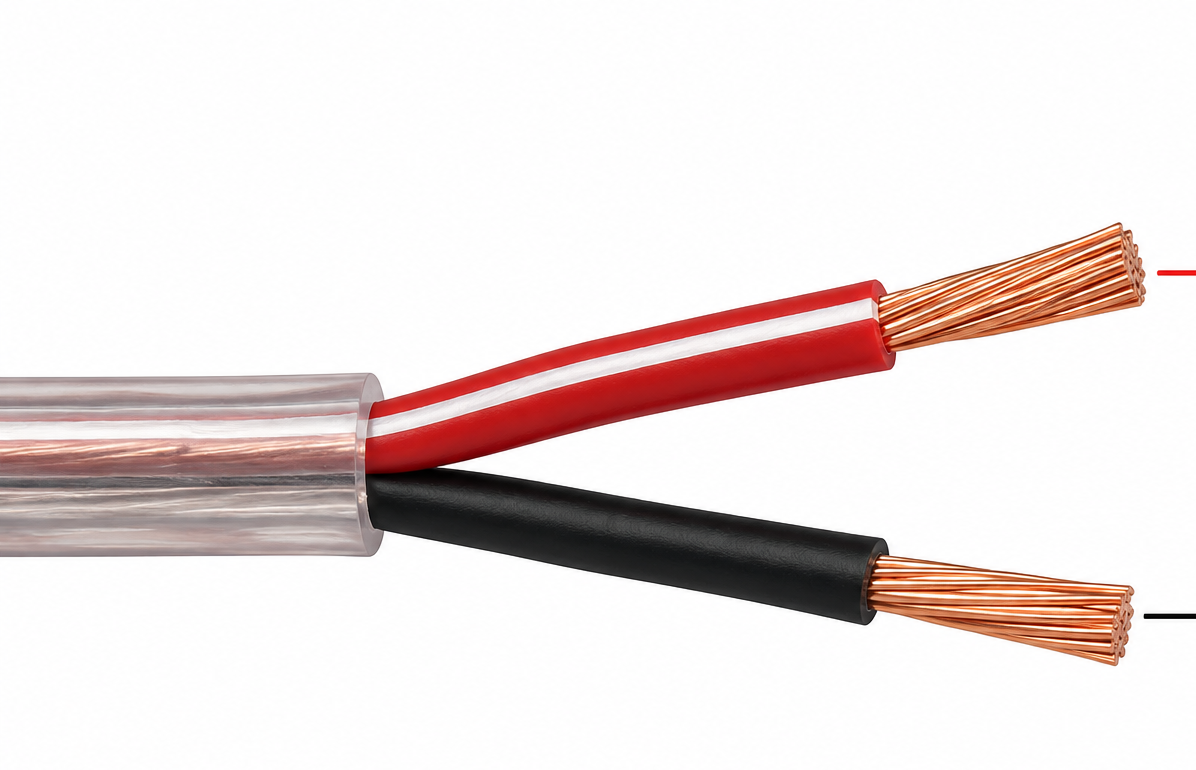
Speaker wire has two wires inside: one is + and one is −. The sound needs both wires to make a full loop from the amp to the speaker. One side of the wire usually has a stripe, ridge, writing, or different color so you can keep track. Use the marked side as + the whole way: amp + to speaker +, and the plain side as −: amp − to speaker −.
Different wires look different, and you can use any wire that has at least two (some have three; the third one is for ground, which you don’t need; you can just let it hang).
Wiring a speaker — for real beginners
Okay, the hands-on part. We'll strip the wire, connect it to a speaker, and continue the line to the next speaker. Take it slow. Always turn the amp OFF while wiring or you will get zapped - can get dangourse when you are on a ladder.
Stripping the wire
remove coating/ Separate the two wires
At the end of your speaker wire, gently pull the two strands apart for about 2 inches so you have two separate tails. Notice one has a marking (stripe/ridge/color) that's your reference side. some wires will have an extra coating so then to have an extra step remove that first
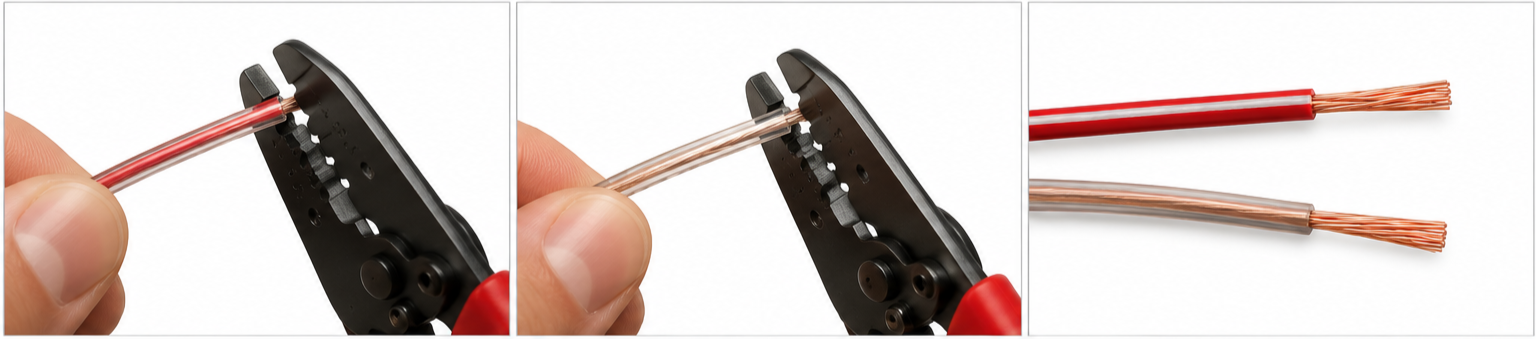
2. Strip off the insulation
Using a wire stripper (or carefully, a scissors), remove about ½ inch of the plastic coating from the end of each wire. You want to expose the bare metal threads underneath without cutting them off.
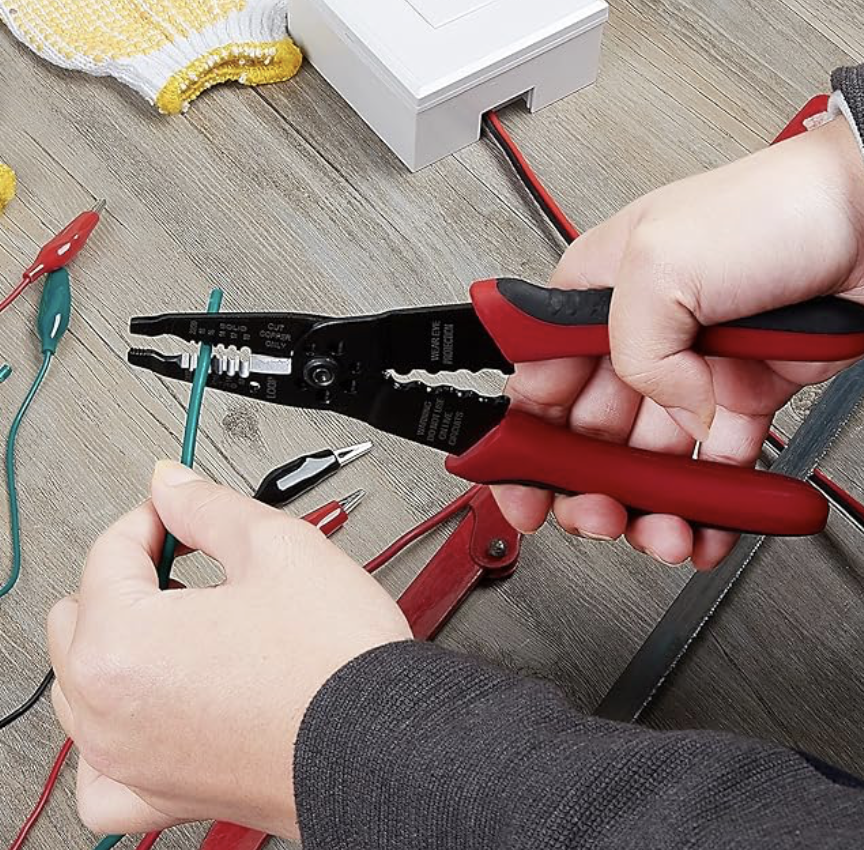
A wire stripper
You can get at any hardware store or Amazon. you put the wire it the hole depending on the AWG/thickness and pull
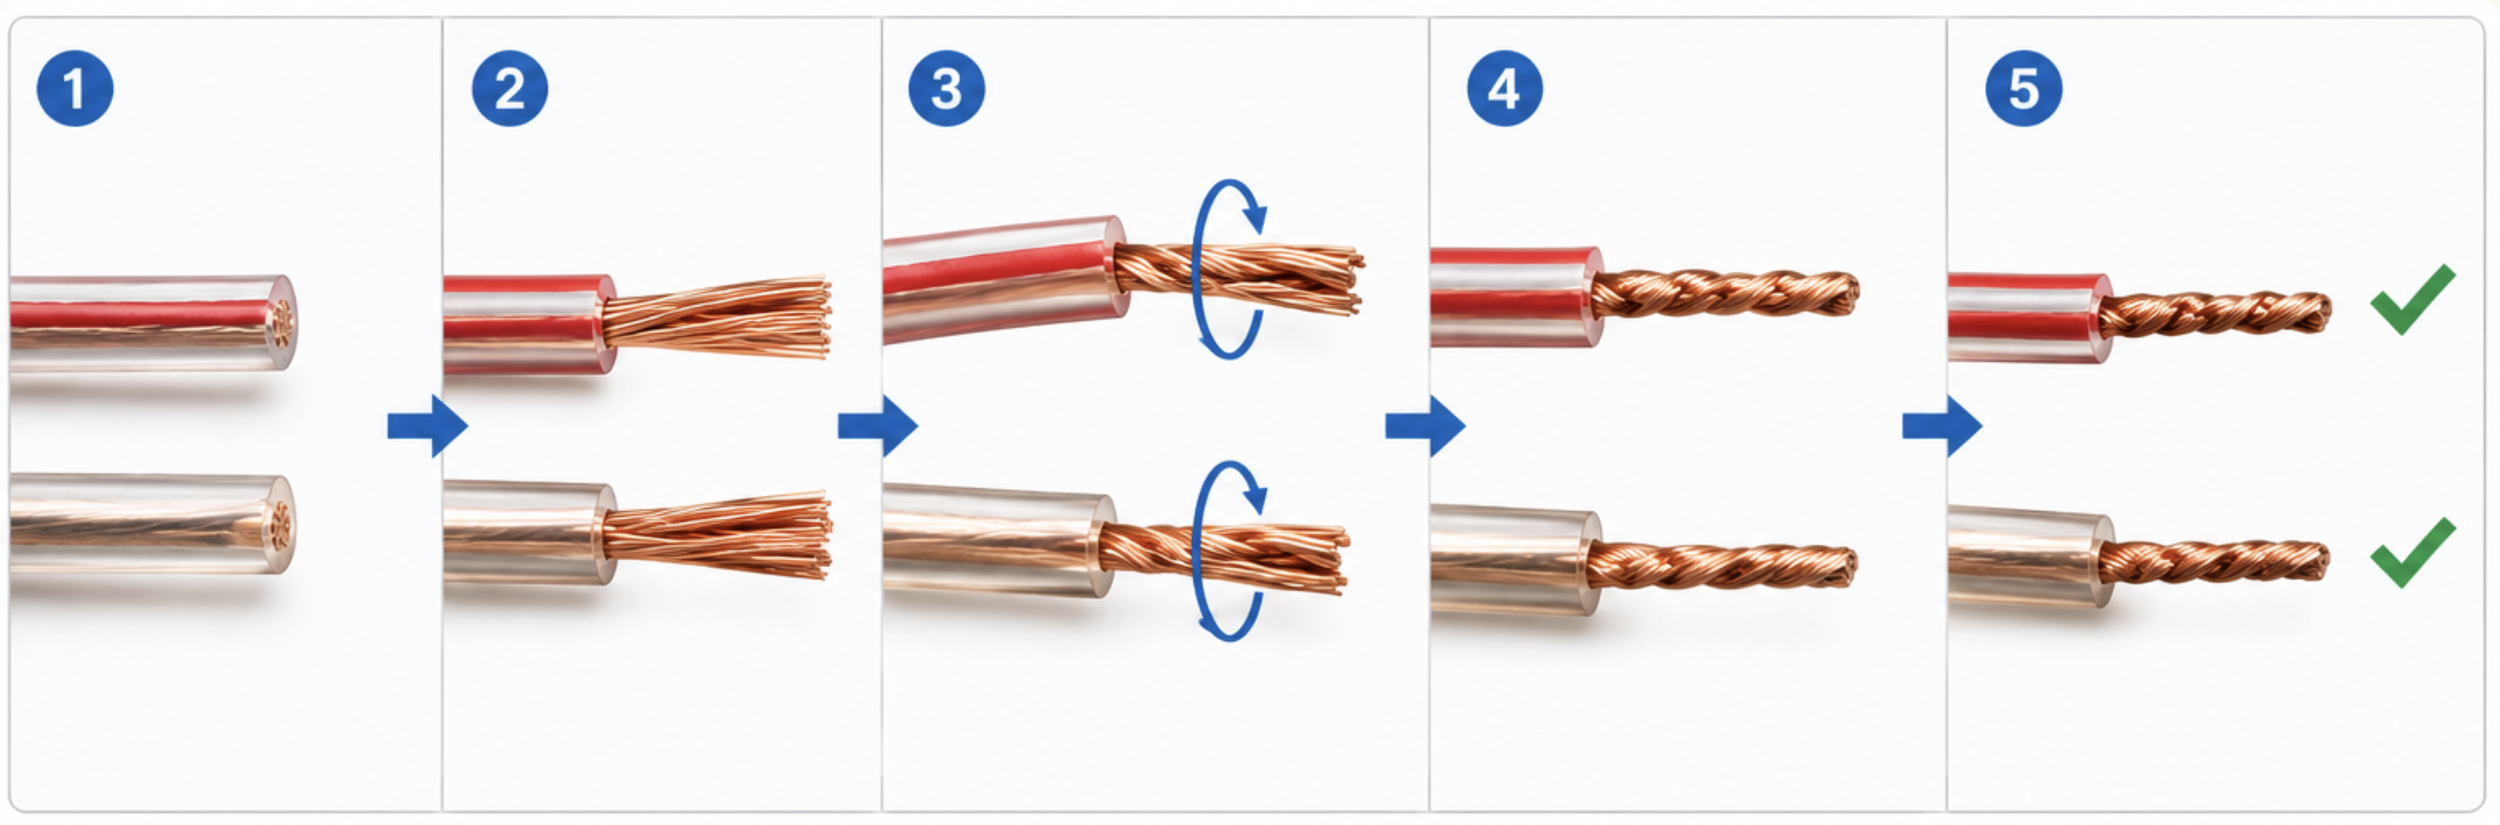
3. Twist the threads/connect to devide
Twist the little bare metal strands of each wire tightly together so they form one solid tip. Loose stray strands cause shorts and buzzing.
Make it stand out
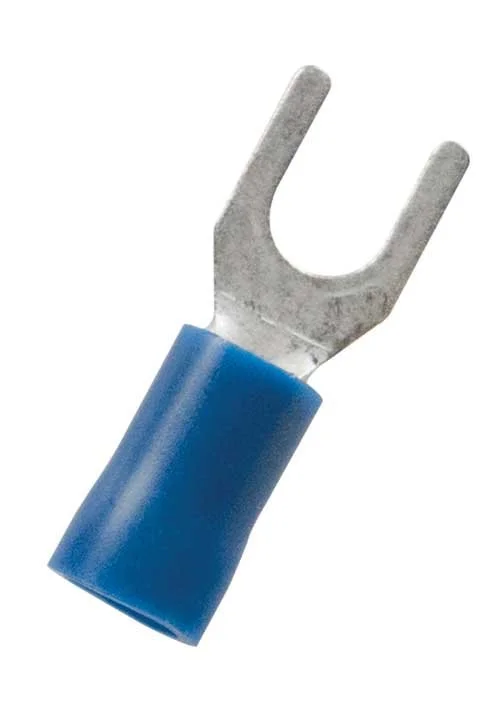
Pro tip: You can also ad a terminal to the wire whit makes it much easier and saves you from loose wires . you put the wire in and crimp (smush) it down until when you pull it doesn't come out. see here how to do it
4. Lock it down
Release the spring clip or tighten the screw post. Give the wire a gentle tug — it should hold firm and no loose threads should be touching the other terminal.
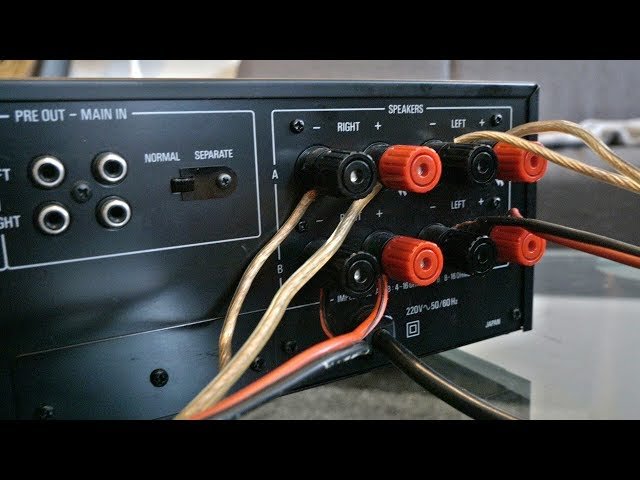
Here are different types of amp to wire connections:


Pro tip: You can run two line from the same terminal.
Picking the amplifier
A good amplifier can cost over $2000, depending on your project and the quality of sound you want. That’s what you should invest in it.
QUICK MATH (70-VOLT)
Add up the tap wattage of every speaker. Ten speakers at 10W each = 100W of demand. Pick a 130W+ amp. Easy.
Use the calculator below to skip the math — tell it your space and it'll suggest an amp:
⚡ Amp & Power Calculator
Answer a few questions and we'll suggest the amp wattage and setup that fits your install.
STEP 6
Running & securing the wire to the wall
Loose wire on the floor gets tripped on, yanked out, and chewed by mowers. Once your line works, fasten it down neatly along walls, ceilings, and beams. Here are the three tools you'll actually use — and when to reach for each.
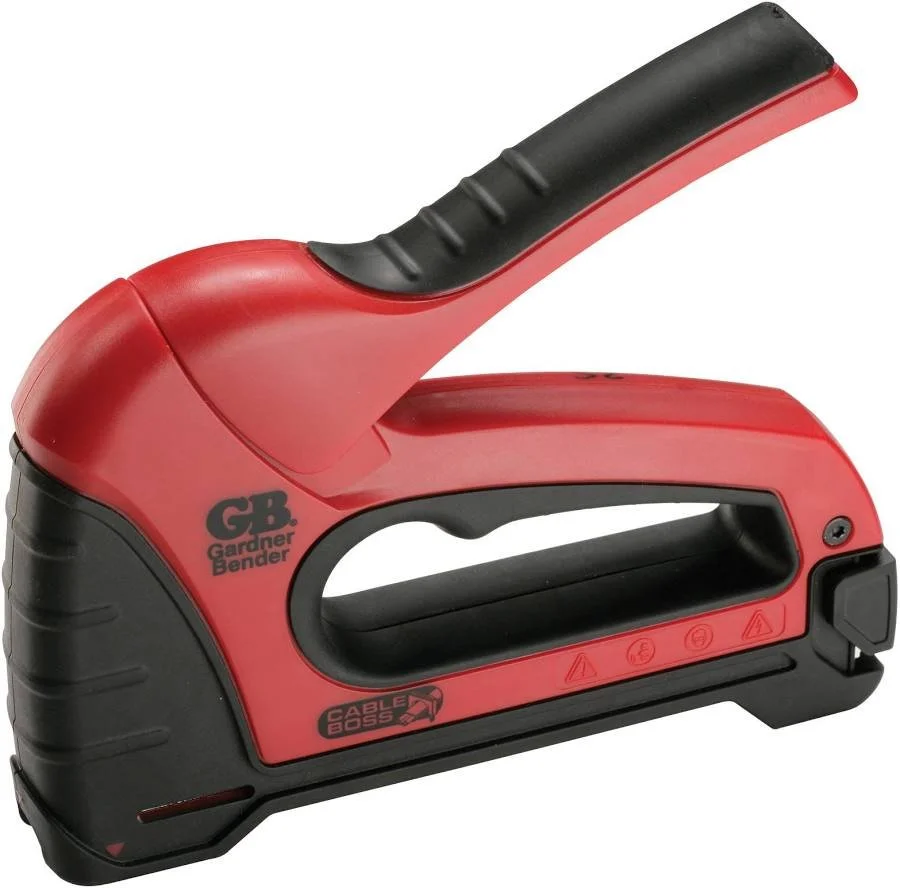
1. The cable staple gun (your everyday workhorse)
This is a regular-looking staple gun loaded with insulated cable staples — rounded staples with a little plastic saddle that arches over the wire instead of crushing it. You press the nose against the wall right on top of the wire and squeeze. One staple every 12–16 inches keeps the run tight and straight.
Use the right staples. Don't use flat office-stapler staples — they cut into the wire and can short it. Buy "insulated" or "round-top" cable staples sized for your wire gauge. Thicker 12/14 wire needs a wider saddle.
2. nail clips
sometimes called cable tacks or wire staples-with-a-nail. Each one is a little plastic half-circle saddle with a single small nail through it. You lay your wire in the saddle, hold the clip against the wall, and tap the nail in with a hammer. The plastic arch holds the wire without crushing it, and the nail anchors the clip to the surface.

3. Screw anchors (stronger)
Into a wood stud or beam: a screw bites straight in. No anchor needed — this is the strongest mount. Find the stud and aim for it.
Into drywall (hollow wall): a plain screw will rip right out. Use a wall anchor — push or screw the plastic/metal anchor into a drilled hole first, then drive your screw into the anchor. The anchor spreads out behind the wall and grips.
Into concrete or block (outdoor walls): drill with a masonry bit and use a concrete screw anchor (like a plastic sleeve or sleeve anchor) rated for the speaker's weight.

The simple order of operations
1 Mount the speaker first
Anchor the speaker or bracket to the wall where your map says, aimed the right direction. Stud if you can, anchor if you can't.
2 Run the wire to it
Staple the wire neatly along the wall/ceiling from the amp toward the speaker, snug between staples.
3 Leave a little slack at each end
Don't pull the very last few inches tight at the speaker — leave a small loop so you can connect, adjust, or re-strip later without the wire fighting you.